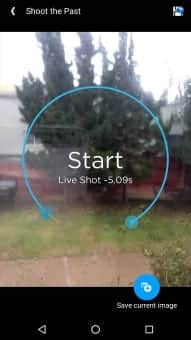
The headlining feature to go along with the iPhone 6s is called “Live Photos,” which is a camera mode that captures the few seconds of video that occurred before and after you hit the shutter button, and displays them kind of like a GIF. This goes back to something else that Apple is really good at: re-branding existing technology (GIFs) to make them seem revolutionary (Live Photos). But coming back to Android’s strengths, of course, we already have some options to emulate this new feature. For the rest of the article below, We’ll cover the process with the app we liked the most—then at the end of the article, We’ll also provide links to some additional Android apps that come with “Live Photos” functionality. The How-To Segment Step 1: Install Camera MX Our favorite app that brings the iPhone’s Live Photos feature to Android is called Camera MX, and it’s availble for free on the Google Play Store. To begin, search the app by name and get it installed, or head directly to the install page at the following link.You can get it from here(Play Store link). Step 2: Taking a ‘Live Shot’ Camera MX has a shooting mode called “Live Shot” that behaves exactly like the Live Photos mode on iPhones, which means that the animated portion of your photo is recorded a few seconds before you tap the shutter button. So to use the feature, make sure to put Camera MX into “Live Shot” mode by tapping the spiral-shaped icon on the top or left side of your screen. From here, hold your device still for a few seconds and frame up your shot, then tap the shutter button to capture the scene.
Step 3: Viewing and editing your ‘live shot’ After a few seconds of processing, your Live Shot will be ready to view, so tap the gallery thumbnail in the corner to check it out. From here, you’ll see a still photo, but similar to Apple’s Live Photos, the image becomes animated when you press and hold the screen.
If you’d like to change the beginning or end of your Live Photo-like looping video, tap the edit button at the top of the screen, then choose “Edit Live Shot.” From here, you can use the sliders to choose where your video starts and finishes, but make sure to hit the “Save” button when you’re done.
Step 4: Sharing yor ‘live shot’ When you’re ready to show your creations to other people, tap the “Share” button at the top of the screen, then choose “Share Live Shot.” From here, you’ll see Android’s share menu, where you can select an app or service to send the file to. The video is saved as a common MP4, which means it’s compatible with most image-sharing sites and social media services. This was all about using CameraMX for the purpose, there are some other live shot emulator apps too, which are listed below and are worth a try.
Gif Me! Camera: Records video clips as animated GIFs Graphica Live Photo Maker: Animated GIF camera & editing app GIF Camera
Queries and app suggestions are welcomed.


